Being Microchip Resourceful During The Pandemic
Have you seen the prices for Raspberry Pi's lately? The pandemic has taken another victim with chip shortages, inhospitable international shipping, and distribution issues. There are crazy talk prices for my beloved project platform - scalpers ahoy! When they do become available, they sell out instantly. Thankfully, I'd always kept a handful of extra Pi's lying around, so I'm OK when it comes to having a steady supply of Pi's for projects.

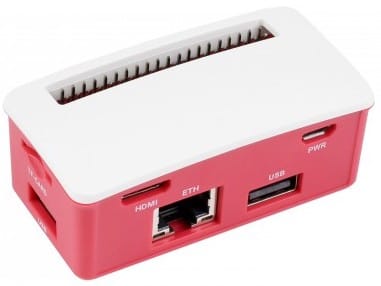
Part of my preparedness is taking advantage of what you have, in my case, a pair of unused Raspberry Pi Zero 1.3's. To be honest, I don't know why I bought Zero 1.3's in the first place: there's no Wifi, no networking, and no Headers. They are viable platforms with the GPIO pins and camera hookups, but require extras to get them online. Most importantly, they draw very few watts and are great for always-on use - no reason to devote a thousand watt desktop computer! These low cost Pi's usually run about $5 (probably why I have them), but have been spotted for 5-7 times as much on eBay. I've considered selling scalping my extra ones, but when I stumbled across Waveshare's Ethernet / USB Hub Case for Raspberry Pi Zero Series $16 (pictured left), a project plan fell into place...
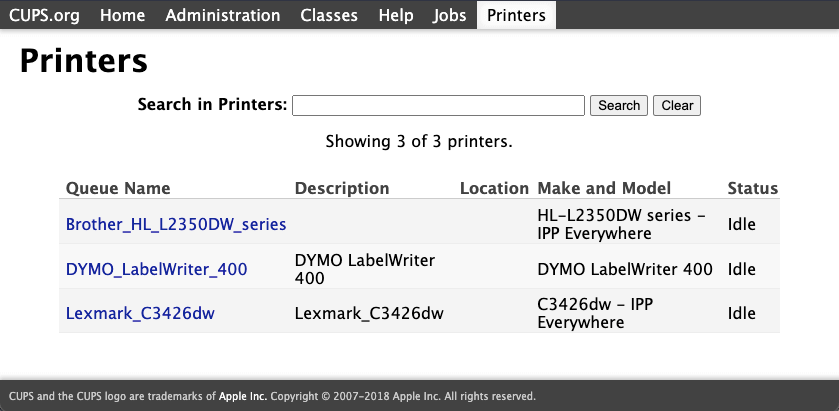
I'd been meaning to take my assorted laser and label printers and set them up with a single network print server running CUPS. I've been plugging and unplugging a USB cord with a hub attached to all 3 printers as I needed to print, and have kept the printers off the local network due to the main computer being off much of the time. This new Raspberry Pi Zero Case + HAT is perfect: it adds 3 full-size USB-A ports and an Ethernet port, so I can turn three USB-only printers into (wired) network printers - in effect replacing a USB hub with something much smarter! It also solves the network-crippled Zero 1.3 issue, without any additional hardware dongles!
Command Line Twiddling
Installing the HAT onto the Raspberry Pi Zero is easy, after a quick check of the Wiki. I used the latest version of Raspberry Pi Imager.app to install Buster Lite as the OS on my MicroSD Card, as I wanted it to run headless and remove any graphical user interface overhead. Since I can avoid a trip to the sudo raspi-config with the new Raspberry Pi Imager.app, I pre-filled out the computer name, primary username, password and more, including turning on SSH access for emergencies.
Once booted and checked, I used Tom's Hardware - Raspberry Pi Print Server Instructions to install CUPS and add my user to the administrators. In order to use my Dymo Labelwriter 400, I needed to install the OS level print drivers, by adding this to the above instructions:
sudo apt install printer-driver-dymo
Although, after reboot, I was having trouble having the printer show up as an option. I decided to build the older drivers from scratch to see if that fixed the issue. Alas, Dymo has seemingly removed the Linux drivers from their website in 2022. The Wayback Machine helped me download a local copy of dymo-cups-drivers-1.4.0.tar.gz, which I could save locally to my home folder. From here, I can follow Johnathan.org's step-by-step instructions for building it and installing it from source. Very easy!
Have You Tried Turning It Off and On Again?

After all the trouble, it turned out the USB cord wasn't plugged firmly, and all of the extra work was for naught, as the Dymo Labelwriter 400 showed up as an attached device after a reboot. Of note, I can easily find my network print server on the network using it's assigned network name: cups.local, but doing any administrative functions at the web portal https://cups.local:631/ will barf unless you use the IP address instead. I assigned the device a static IP, and also set it with a reserved IP at my router, so it can forever be accessed by the same local IP address, and can be administered to add new printers and more.
Update Aug. 2023: Found this enterprising fellow who gets AirPrint working with CUPS for printing from your phone. Good for Grandparents who love to print things!