You might want to start at part one or part two or part three of this four part developing story about making my own e-reader out of an Apple iBook 500 and some eBay parts. Feeling frisky? Browse my heavenly site!
We're in the final stretch!
As I was testing the previous build of the eBook, I noted it fit quite comfortably inside an old wooden pencil case I'd been hanging onto since college.
Seeing the opportunity to recycle, and more importantly, spend no more money, I'd tossed my previous plans, and decided to house my eBook in this old wood box. A bit of cutting to size, re-fit a piece of scrap wood to cover the hole, and embed the joystick buttons in an out-of-sight place with easy access.
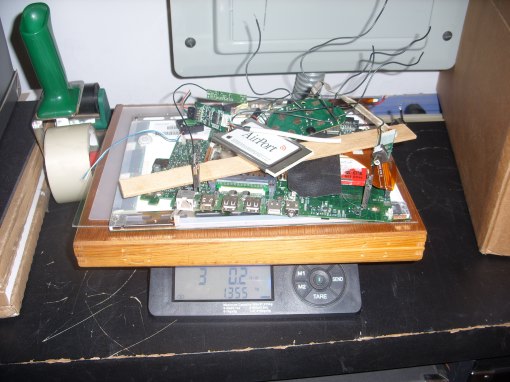
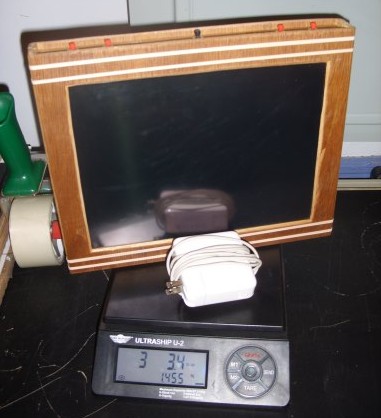
Again, the first weigh, with the new box. Now coming in at slightly over 3lbs - my final weight is less, as there's a piece of plexiglass in there I was intending to use as a screen protector.
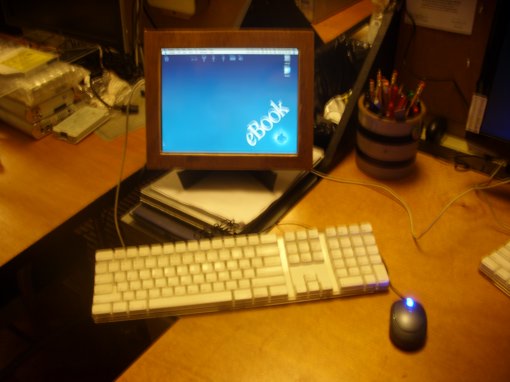
Here's the final build, with external keyboard and mouse to install other software.
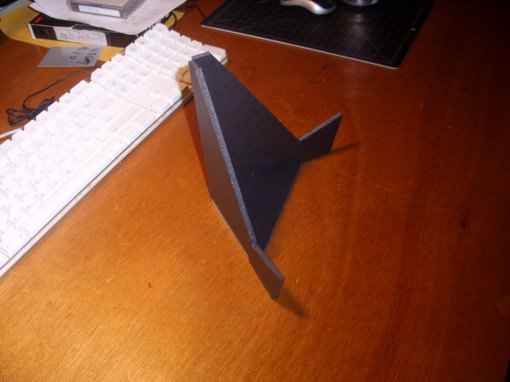
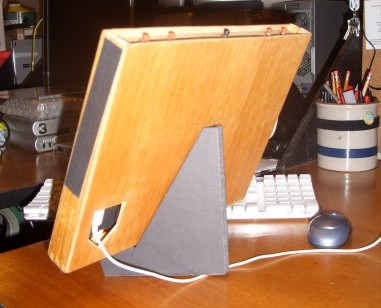
I also made a cheap stand out of foamcore. This holds the eBook in portrait or landscape.
Landscape View on Stand
Front glamour view... Ready to browse the web.
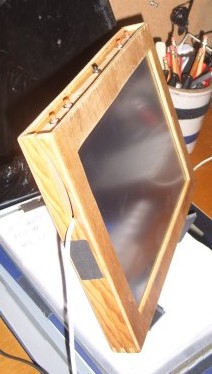
eBook Side View
You can see the 5 buttons across the top. The center black button is the new power button. The speakers are mounted on the top to the left and right of the power button. The other 4 buttons can do multiple things, depending on the programming. In this config, the left 2 buttons go page forward and backward in the PDF Viewer, and the right 2 buttons rotate the PDF 90 degrees for a bigger, better view.
Note the wooden box had a cutout for opening it, and here I'm using it as a cable pass-through. In the final version, I tape the sides closed with black gaffers tape, but can peel it off if I need to get inside again. This way, I can attach a firewire drive or network cable, if I so desire. In most cases, the eBook only needs a power cord. The Airport offers connectivity, and the touchscreen handles user input.
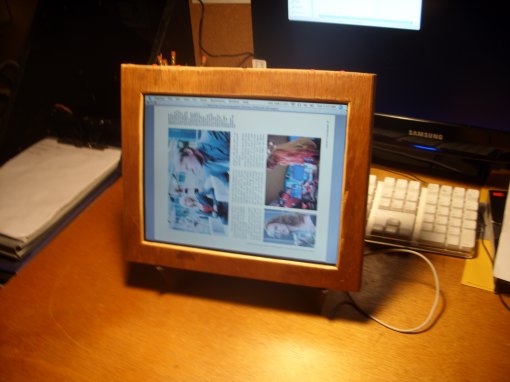
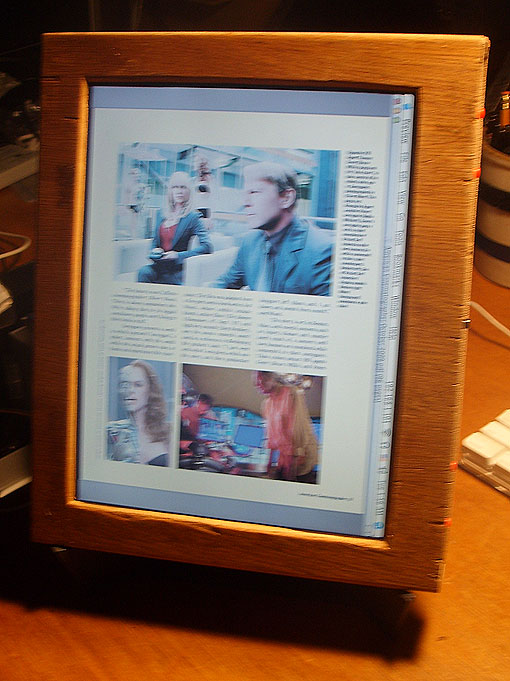
eBook in Portrait View
Here I have a page of a PDF open in portrait format, and turned 90 degrees so it's readable. The menu bar is still at the top of the screen, which is now the left side. You'll note the page forward and back buttons are now comfortably on the top right side, so you can hold the reader in both hands and flip pages without having to touch the screen.
Shot from behind, with the power cutout visible in the lower left. This allows the eBook to be flat against the wall when hung like a painting. It's now usually stored right by my bed (in order to encourage more reading) and putting a simple hole in the back makes it hang nicely on the wall. If I so desired, I could have it also act as a custom digital picture display, using the built-in screen-saver and putting favorite photos in a folder on the boot drive.
In the interest of not burning out the backlight (my guess as to what will break first on this device), I generally sleep the machine when not in use.
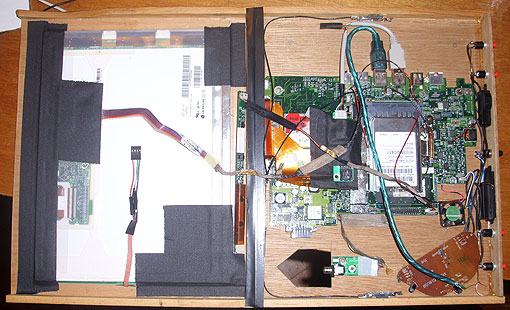
The Guts of the eBook
Final shot of the guts. Note the touchscreen controller isn't connected - the unit needs to be closed to facilitate that. See the next pic for the labeled parts. I used a stick (or two) of hot-melt glue to mount any motherboards to the case. Simply stick the tip of the glue-gun through the mount hole, give it a healthy squeeze, then let it harden. The screen is held in place by double-stick tape, then the touchscreen, then more double-stick tape, then the LCD display, then the two sandwiched devices were gaffer's taped to the wooden case. I was considering adding tiny supports to the back corners, but found it unnecessary.
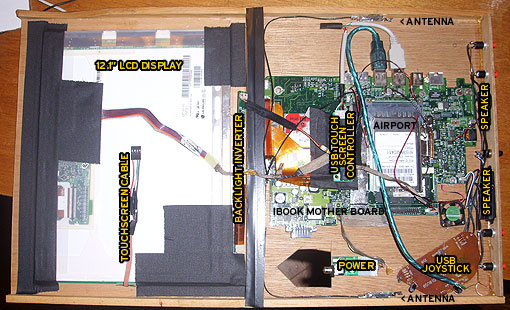
The joystick controller is in the lower right corner. The box hinges at the black bar of tape across the middle. As opposed to hard-wiring the USB devices straight to the motherboard, I shortened the cables they came with to mere inches, then plug them in the available USB ports. This way, I can swap in a real keyboard or other USB device as I need, or swap the motherboard in case it fries. In most cases, I won't need to change anything.
Final weight, with the power adapter - 3lbs. 4 ounces! It's under 3lbs. without the power adapter! Ignore the rubber bands holding it together for now. It's done, and works!
A Bit About the Software
Besides the Macintosh OS, and the default apps, I only needed two special pieces of software to get this thing operational. If I hadn't included the joystick and extra buttons, this first software isn't even necessary. I bought it nonetheless, and found it invaluable!
Controller Mate
http://www.orderedbytes.com/controllermate/ Only $15!
This do it all utility can reprogram nearly any device attached to your Mac. It easily recognizes both the joystick & the touchscreen controller even! It's easy to program actions, even multiple actions in a row. Most of my 'actions' have included sound effects to give an auditory feedback to their function. I have yet to reprogram the buttons to behave differently in different applications (just you wait!), but that will make this device super-awesome!
TouchKit
This is the free touch screen driver that came with my kit. The version on the CD was very out of date, but a quick search brought up this tiny Chinese company who seem to support nearly any OS! Doing the setup was odd at first, cause I neglected to RTFM. I was pressing on the dot on screen over and over to no avail. When I realized I had to HOLD my finger on the spot, things moved quickly after that. The configuration is a bit clunky, but once I got the hang of it, I found it powerful and easy to use.
A Special Note about the On-Screen Keyboard
It's the default one on the Mac OS, so I did not pay for it! To enable this on your own project:
- Go to System Preferences: International: Input Menu. Check 'Keyboard Viewer'
- You might have to check the 'Show Input Menu in Menu Bar' option at the bottom of the preference pane.
- This will put a small (American) flag in your menu bar near the date in the upper right hand corner of your screen. Select that menu, then 'Show Keyboard Viewer'.
- Ta-Da! Free on-screen keyboard!
Final Caveat:Prepare to be underwhelmed by this. You cannot use Sticky Keys, nor capitalize by using the shift key (or shift-lock), nor use any of the 'usual' command combination's with this keyboard. And unless you run a type interpreter like the iPhone, this won't auto-capitalize for you.
Thankfully, I can reprogram those buttons on the top to act like actual key-presses, thereby duplicating the Shift, Command and Control and Option keys. This is key, especially if you're as comfortable with your keyboard as I am. I feel a bit dimwitted for pulling menus constantly with the touch screen.
The Demo Video
In the News
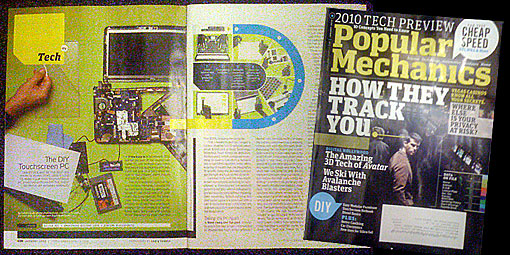
I was browsing my January 2010 issue of Popular Mechanics, when I found this great 2-page article that basically does very similar things that I did here in this tutorial. They choose a smaller netbook, and refit it into the original case. But they do offer some good links and ideas for your own projects!
